In this post I'll show you how to integrate the Contentful CMS with the Next.js App Router.
We're going from 0 to a production-worthy setup that includes:
- TypeScript types for Contentful content
- Contentful content previews / Next.js draft mode integration
- Automatic rebuilds when Contentful content changes
- Rendering Contentful Rich Text in React
- Displaying mobile-friendly Contentful images with alt text
On GitHub you can find the Next.js-Contentful-TypeScript Starter Repo that I've created based on this blog post.
What We'll Build
We're going with a classic example: A blog! Each blog post has a title, a slug (which also serves as a unique identifier), a body (rich text) and an image.
All put together with a few Tailwind CSS classes, the site will look like this:
You can also check it out live here: nextjs-contentful-typescript.vercel.app
In the Contentful UI, this is what our Blog Post content type looks like:

Setting up Environment Variables
In your Next.js project (you can bootstrap one easily using yarn create next-app), configure the following environment variables:
.env.local
CONTENTFUL_SPACE_ID=... # The Contentful space in which the content is storedCONTENTFUL_ACCESS_TOKEN=... # Used to fetch content from ContentfulCONTENTFUL_PREVIEW_ACCESS_TOKEN=... # Used to fetch content/changes that is not yet publishedCONTENTFUL_MANAGEMENT_TOKEN=... # Used to generate TypeScript types for ContentfulCONTENTFUL_PREVIEW_SECRET=... # Used to allow only editors to access preview mode
To get the correct values for CONTENTFUL_SPACE_ID, CONTENTFUL_ACCESS_TOKEN and CONTENTFUL_PREVIEW_ACCESS_TOKEN, log into Contentful, go to Settings -> API keys and then click Add API key.
You can get the CONTENTFUL_MANAGEMENT_TOKEN by going to Settings -> API keys, clicking the Content management tokens tab and then clicking Generate personal token.
The CONTENTFUL_PREVIEW_SECRET we will choose ourselves, so you can put here whatever you like.
Generating TypeScript Types for Contentful Content
With the environment variables in place, we can now generate TypeScript types for our Contentful content.
First, install the contentful and cf-content-types-generator packages:
$ yarn add contentful$ yarn add cf-content-types-generator --dev
Now, we can run the following commands:
$ export $(cat .env.local | awk '!/^\\s*#/' | awk '!/^\\s*$/')$ cf-content-types-generator \--spaceId $CONTENTFUL_SPACE_ID \--token $CONTENTFUL_MANAGEMENT_TOKEN \-o src/contentful/types \-X
This will create the following files:
src/contentful/types/index.tsTypeBlogPost.ts
If you use Prettier, follow this up with:
$ prettier --write src/contentful/types
All together, I suggest adding the following script to your package.json, so you can easily re-run it at any time:
package.json
{"scripts": {"types:contentful": "export $(cat .env.local | awk '!/^\\s*#/' | awk '!/^\\s*$/'); cf-content-types-generator --spaceId $CONTENTFUL_SPACE_ID --token $CONTENTFUL_MANAGEMENT_TOKEN -o src/contentful/types -X && prettier --write src/contentful/types"}}
Fetching Content from Contentful
Using our freshly-generated types, let's fetch some content from Contentful.
First, let's create a little utility that lets us optionally fetch unpublished posts:
src/contentful/contentfulClient.ts
import { createClient } from 'contentful'const { CONTENTFUL_SPACE_ID, CONTENTFUL_ACCESS_TOKEN, CONTENTFUL_PREVIEW_ACCESS_TOKEN } = process.env// This is the standard Contentful client. It fetches// content that has been published.const client = createClient({space: CONTENTFUL_SPACE_ID!,accessToken: CONTENTFUL_ACCESS_TOKEN!,})// This is a Contentful client that's been configured// to fetch drafts and unpublished content.const previewClient = createClient({space: CONTENTFUL_SPACE_ID!,accessToken: CONTENTFUL_PREVIEW_ACCESS_TOKEN!,host: 'preview.contentful.com',})// This little helper will let us switch between the two// clients easily:export default function contentfulClient({ preview = false }) {if (preview) {return previewClient}return client}
Next, let's create a little helper for fetching one or multiple blog posts:
src/contentful/blogPosts.ts
import { TypeBlogPostSkeleton } from './types'import { Entry } from 'contentful'import { Document as RichTextDocument } from '@contentful/rich-text-types'import contentfulClient from './contentfulClient'import { ContentImage, parseContentfulContentImage } from './contentImage'type BlogPostEntry = Entry<TypeBlogPostSkeleton, undefined, string>// Our simplified version of a BlogPost.// We don't need all the data that Contentful gives us.export interface BlogPost {title: stringslug: stringbody: RichTextDocument | nullimage: ContentImage | null}// A function to transform a Contentful blog post// into our own BlogPost object.export function parseContentfulBlogPost(blogPostEntry?: BlogPostEntry): BlogPost | null {if (!blogPostEntry) {return null}return {title: blogPostEntry.fields.title || '',slug: blogPostEntry.fields.slug,body: blogPostEntry.fields.body || null,image: parseContentfulContentImage(blogPostEntry.fields.image),}}// A function to fetch all blog posts.// Optionally uses the Contentful content preview.interface FetchBlogPostsOptions {preview: boolean}export async function fetchBlogPosts({ preview }: FetchBlogPostsOptions): Promise<BlogPost[]> {const contentful = contentfulClient({ preview })const blogPostsResult = await contentful.getEntries<TypeBlogPostSkeleton>({content_type: 'blogPost',include: 2,order: ['fields.title'],})return blogPostsResult.items.map((blogPostEntry) => parseContentfulBlogPost(blogPostEntry) as BlogPost)}// A function to fetch a single blog post by its slug.// Optionally uses the Contentful content preview.interface FetchBlogPostOptions {slug: stringpreview: boolean}export async function fetchBlogPost({ slug, preview }: FetchBlogPostOptions): Promise<BlogPost | null> {const contentful = contentfulClient({ preview })const blogPostsResult = await contentful.getEntries<TypeBlogPostSkeleton>({content_type: 'blogPost','fields.slug': slug,include: 2,})return parseContentfulBlogPost(blogPostsResult.items[0])}
Our blogPosts.ts utility imports some types and helpers from contentImage.ts.
This utility transforms the rather large image asset objects that Contentful provides us with into nice little custom ContentImage objects that have src, alt, width and height attributes.
src/contentful/contentImage.ts
import { Asset, AssetLink } from 'contentful'// Our simplified version of an image asset.// We don't need all the data that Contentful gives us.export interface ContentImage {src: stringalt: stringwidth: numberheight: number}// A function to transform a Contentful image asset// into our own ContentImage object.export function parseContentfulContentImage(asset?: Asset<undefined, string> | { sys: AssetLink }): ContentImage | null {if (!asset) {return null}if (!('fields' in asset)) {return null}return {src: asset.fields.file?.url || '',alt: asset.fields.description || '',width: asset.fields.file?.details.image?.width || 0,height: asset.fields.file?.details.image?.height || 0,}}
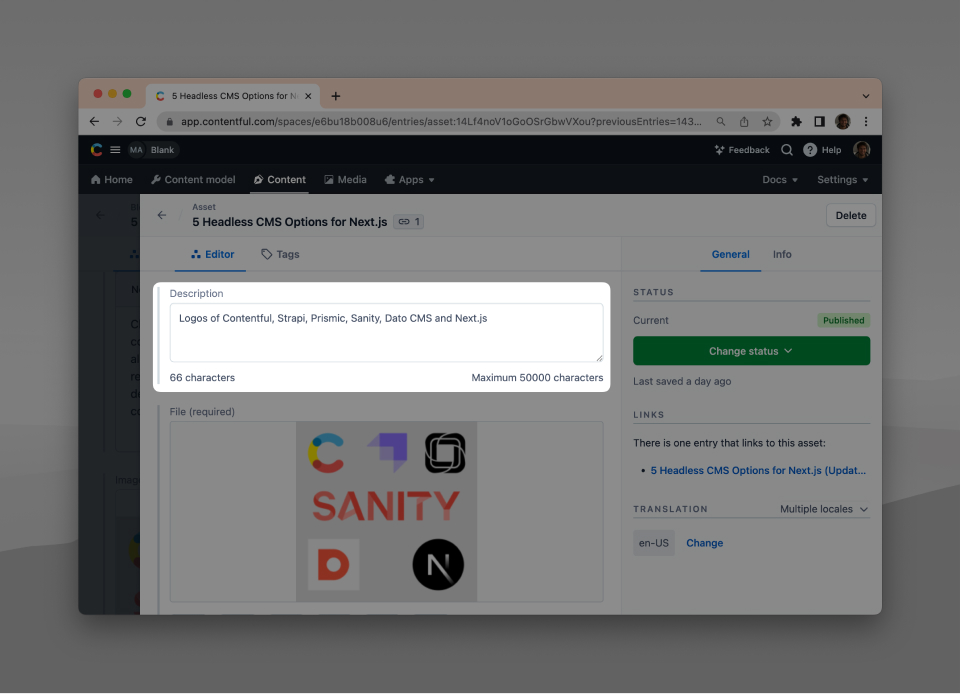
A Note on Images and Contentful
Each image that gets uploaded on Contentful has a description field. This is perfect for our alt text.
To make Contentful images mobile-friendly, we can use the powerful Contentful Images API. Thanks to it, we don't even need to use the next/image component.
When we render the blog post image (shortly in this post), you can see how we use the Images API and the srcSet attribute to render responsive images.
Overall we're writing quite a bit of boilerplate to fetch and prepare our Contentful content. This is of course optional but well worth it in my opinion, otherwise we'd just be moving the same boilerplate to multiple places throughout the codebase.
Rendering the Posts Index
Rendering an index of all our blog posts becomes pretty easy thanks to our boilerplace investment earlier:
src/app/page.tsx
import { draftMode } from 'next/headers'import { fetchBlogPosts } from '../contentful/blogPosts'import Link from 'next/link'async function Home() {// Fetch blog posts using the content preview// if draft mode is enabled:const blogPosts = await fetchBlogPosts({ preview: draftMode().isEnabled })return (<main className="p-[6vw]"><div className="prose"><h1>My Contentful Blog</h1><ul>{blogPosts.map((blogPost) => {return (<li key={blogPost.slug}><Link href={`/${blogPost.slug}`}>{blogPost.title}</Link></li>)})}</ul></div></main>)}export default Home
Rendering Individual Blog Posts
The following BlogPostPage is a bit more complicated. Aside from rendering the actual blog post, it also needs to:
- Generate static params (basically telling Next.js about all the available blog posts)
- Generate meta data (
<title>tag, meta description, etc.) - Render a 404 page if a blog post can't be found
src/app/[slug]/page.tsx
import { Metadata, ResolvingMetadata } from 'next'import { draftMode } from 'next/headers'import { notFound } from 'next/navigation'import { fetchBlogPost, fetchBlogPosts } from '../../contentful/blogPosts'import Link from 'next/link'import RichText from '../../contentful/RichText'interface BlogPostPageParams {slug: string}interface BlogPostPageProps {params: BlogPostPageParams}// Tell Next.js about all our blog posts so// they can be statically generated at build time.export async function generateStaticParams(): Promise<BlogPostPageParams[]> {const blogPosts = await fetchBlogPosts({ preview: false })return blogPosts.map((post) => ({ slug: post.slug }))}// For each blog post, tell Next.js which metadata// (e.g. page title) to display.export async function generateMetadata({ params }: BlogPostPageProps, parent: ResolvingMetadata): Promise<Metadata> {const blogPost = await fetchBlogPost({ slug: params.slug, preview: draftMode().isEnabled })if (!blogPost) {return notFound()}return {title: blogPost.title,}}// The actual BlogPostPage component.async function BlogPostPage({ params }: BlogPostPageProps) {// Fetch a single blog post by slug,// using the content preview if draft mode is enabled:const blogPost = await fetchBlogPost({ slug: params.slug, preview: draftMode().isEnabled })if (!blogPost) {// If a blog post can't be found,// tell Next.js to render a 404 page.return notFound()}return (<main className="p-[6vw]"><Link href="/">← Posts</Link><div className="prose mt-8 border-t pt-8">{/* Render the blog post image */}{blogPost.image && (<imgsrc={blogPost.image.src}// Use the Contentful Images API to render// responsive images. No next/image required:srcSet={`${blogPost.image.src}?w=300 1x, ${blogPost.image.src} 2x`}width={300}height={300}alt={blogPost.image.alt}/>)}{/* Render the blog post title */}<h1>{blogPost.title}</h1>{/* Render the blog post body */}<RichText document={blogPost.body} /></div></main>)}export default BlogPostPage
Rendering Contentful Rich Text with React
You can see that the BlogPostPage above uses a component called RichText. It's a little convenience component that we can use in multiple places of our codebase:
src/contentful/RichText.tsx
import { Document as RichTextDocument } from '@contentful/rich-text-types'import { documentToReactComponents } from '@contentful/rich-text-react-renderer'type RichTextProps = {document: RichTextDocument | null}function RichText({ document }: RichTextProps) {if (!document) {return null}return <>{documentToReactComponents(document)}</>}export default RichText
Enabling Contentful Content Previews in Next.js
In the code so far, you might have spotted us using { draftMode } from 'next/headers'. This is what will allow us to implement Contentful Content Previews in the Next.js App Router.
On the Next.js side of things, we need 2 routes for this:
GET /api/draft?previewSecret=<preview-secret>&redirect=<pathname>to enter draft modeGET /api/disable-draft?redirect=<pathname>to exit draft mode
When entering draft mode, Contentful will provide us with a preview secret of our choice (remember the environment variable CONTENTFUL_PREVIEW_SECRET).
We will also receive a path to redirect to, after the preview mode was enabled.
Next.js: Enter Draft Mode
We can use an API route to enable draft mode in Next.js:
src/app/api/draft/route.ts
import { draftMode } from 'next/headers'import { redirect } from 'next/navigation'const { CONTENTFUL_PREVIEW_SECRET } = process.envexport async function GET(request: Request) {const { searchParams } = new URL(request.url)if (searchParams.get('previewSecret') !== CONTENTFUL_PREVIEW_SECRET) {return new Response('Invalid token', { status: 401 })}draftMode().enable()redirect(searchParams.get('redirect') || '/')}
Contentful: Setup Content Preview
To setup the content preview in Contentful, go to Settings -> Content preview and then click Add content preview.
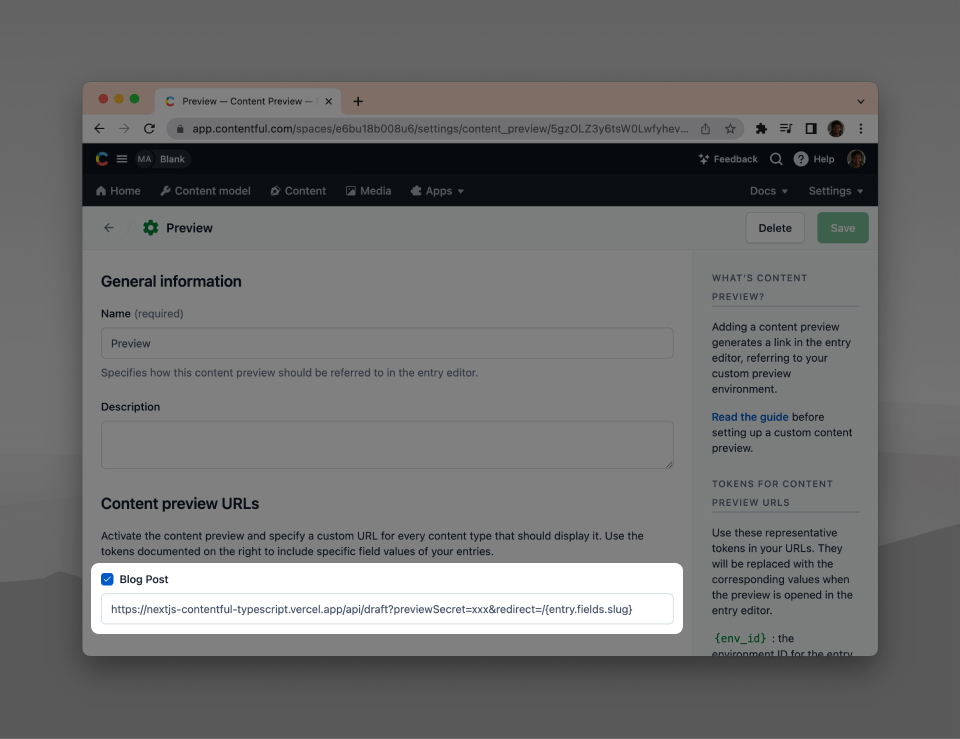
Check the content types for which you want to enable the content preview and enter your site's URL in the following format:
<base-url>/api/draft?previewSecret=<preview-secret>&redirect=/{entry.fields.slug}
Contentful will fill in the {entry.fields.slug} token with the blog's slug.
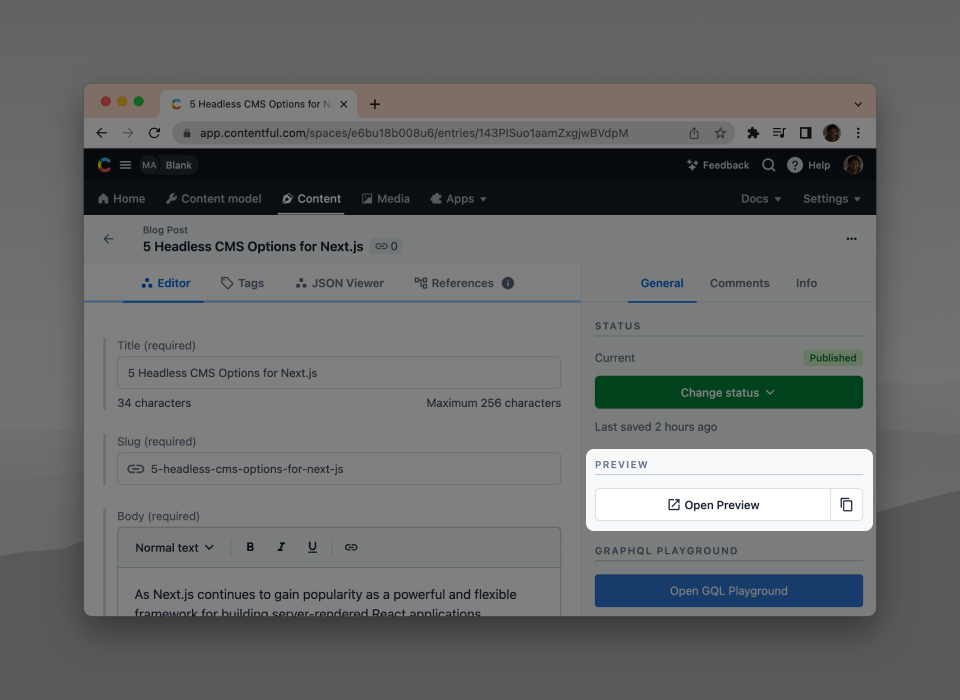
After setting this up, you will see an Open preview button for every blog post in the Contentful UI:
Next.js: Exit Draft Mode
When draft mode is enabled, we want to show this to the user prominently and let him easily exit draft mode.
To check if we're in draft mode, we can use { draftMode } from 'next/headers'.
Let's display a little banner at the top of the page when we're in draft mode:
src/app/layout.tsx
// ...function RootLayout({ children }: { children: React.ReactNode }) {return (<html lang="en"><body className={inter.className}>{draftMode().isEnabled && (<p className="bg-orange-200 py-4 px-[6vw]">Draft mode is on! <ExitDraftModeLink className="underline" /></p>)}{children}</body></html>)}// ...
<ExitDraftModeLink /> is a little helper component that links to /api/disable-draft and provides the current pathname as the redirect.
We need to put this into its own component because usePathname() can't be used in React Server Components:
src/app/ExitDraftModeLink.tsx
'use client'import { usePathname } from 'next/navigation'import React from 'react'function ExitDraftModeLink(props: React.HTMLProps<HTMLAnchorElement>) {const pathname = usePathname()return (<a href={`/api/disable-draft?redirect=${pathname}`} {...props}>Exit</a>)}export default ExitDraftModeLink
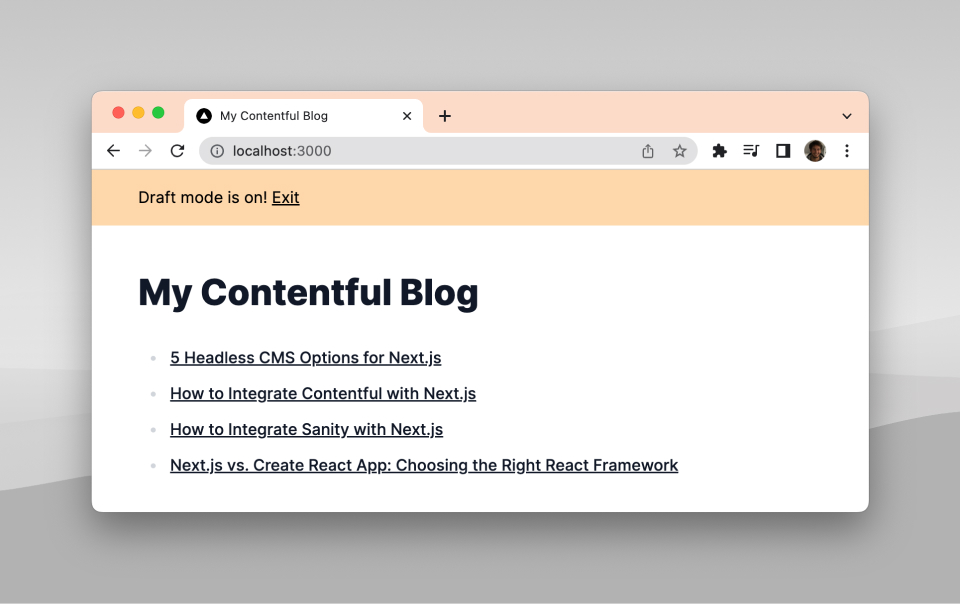
After putting this together, we now see a little banner whenever draft mode is enabled that lets us easily exit it:
Now the only missing piece is our API route that lets us actually exit draft mode:
src/app/api/disable-draft/route.ts
import { draftMode } from 'next/headers'import { redirect } from 'next/navigation'export async function GET(request: Request) {const { searchParams } = new URL(request.url)draftMode().disable()redirect(searchParams.get('redirect') || '/')}
Rebuilding the Next.js Site when Contentful Content Changes
Because our Next.js blog is statically generated, we need to rebuild our site whenever content on Contentful changes.
How to do this depends on your hosting provider, but the process usually looks more or less the same. Here's how to do it if you host your site on Vercel:
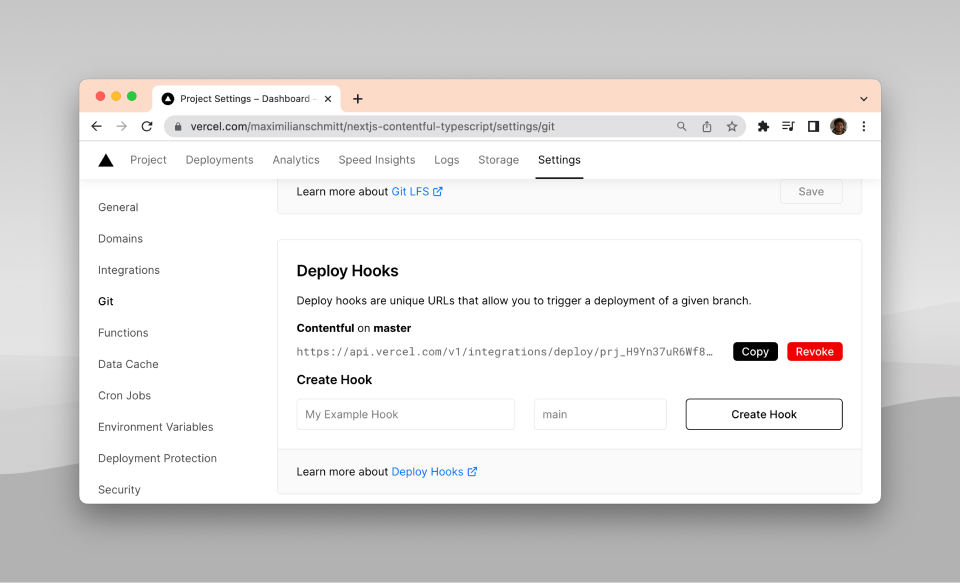
On Vercel, go to your project's Settings -> Git. Scroll down a bit until you see Deploy Hooks.
Give it the name "Contentful", enter the name of your branch (usually master or main) and click Create Hook. Then copy the URL.
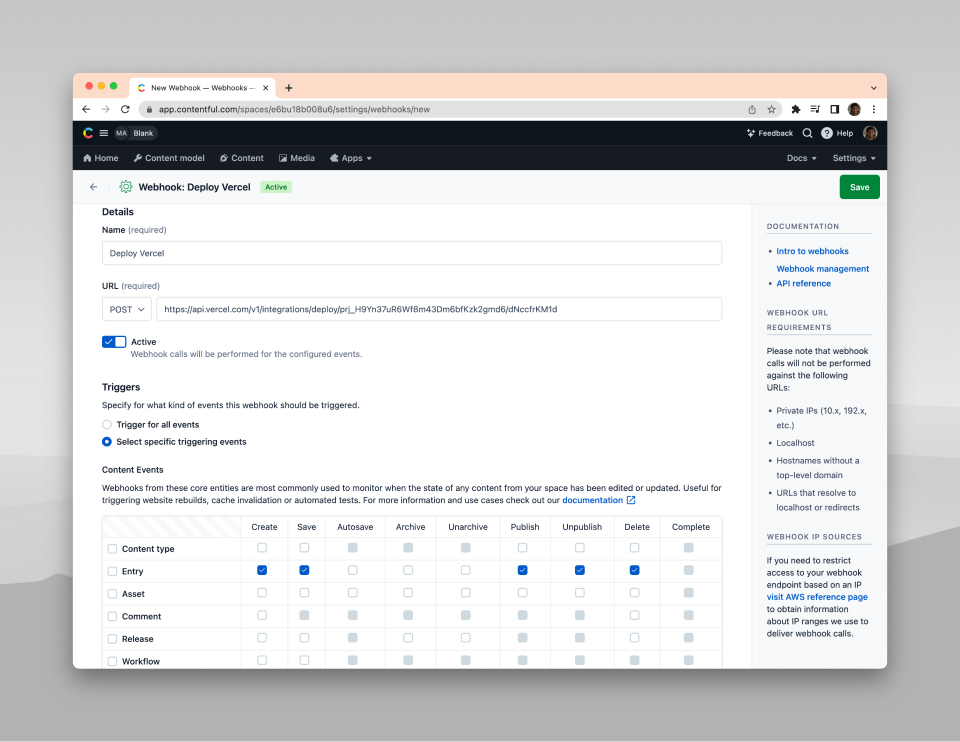
In the Contentful UI, go to Settings -> Webhooks and click Add Webhook. Paste the URL and choose when the webhook should be called:
Now your site will rebuild whenever your content on Contentful changes!
Conclusion
There are a few moving parts to getting a production-ready Next.js/Contentful/TypeScript setup but I hope this post was helpful in explaining everything.
If you'd like to take a closer look at the code, you can check it out on GitHub.
And here you can find a deployed version of our Next.js example blog.